To begin configuring TCP/IP, folloe these steps:
- Start--> Settings--> Conrol Panel--> Network and Dial-Ip connections to open the Network and Dial-Up Connections dialog box, which list all of the currently installed network components.
- Right-click one of your network adapters and select properties to open the Properties dialog box for your adapter.
- If you do not see Internet Protocol (TCP/IP) in the scrolling list, follow the next three steps. If you do see it, skip to step 7.
- Click the install button, which brings up the select Network Component Type window.
- Click Protocol in the list and click the Add button to bring up the Select Network protocol dialog box.
- Select Microsoft from te left frame and Internet Protocol (TCP/IP) from the right frame and click the OK button.This take you to the Property dialog box for your adapter. Now Internet protocol (TCP/IP) should appear in the scrolling list.
- Click Internet Protocol (TCP/IP) and the Properties button, which will oen Internet Protocol (TCP/IP) properties window.
- Initially, you see the General tab, which is set to obtain your IP address, subnet mask, default gateway, and DNS server via DHCP.
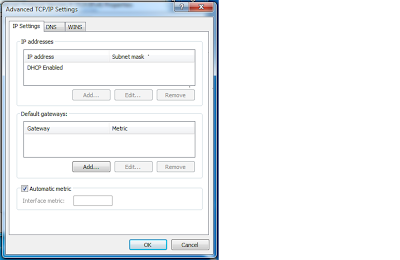
- Click the advance button, which brings up the Advance TCP/IP Settings dialog box.
- Notice the IP settings, DNS, WINS, and Options tabs along the top of the Advanced TCP/IP settings dialog box.

No comments:
Post a Comment